4 Easy After Effects Expressions To Use In Your Workflow

When it comes to expressions, there are a ton of valuable resources everywhere. Expressions can help you create organic animations without keyframes, control multiple layers or effects with one layer, or even help you build your own plugin. Expressions are based in the language of JavaScript, so it bridges the gap between animator and developer. In my 8 years as a motion designer, I’ve used several different expressions, but today I’ll share a few that I have gravitated towards over the years.
**Indicates updates below
1) Inertia Bounce
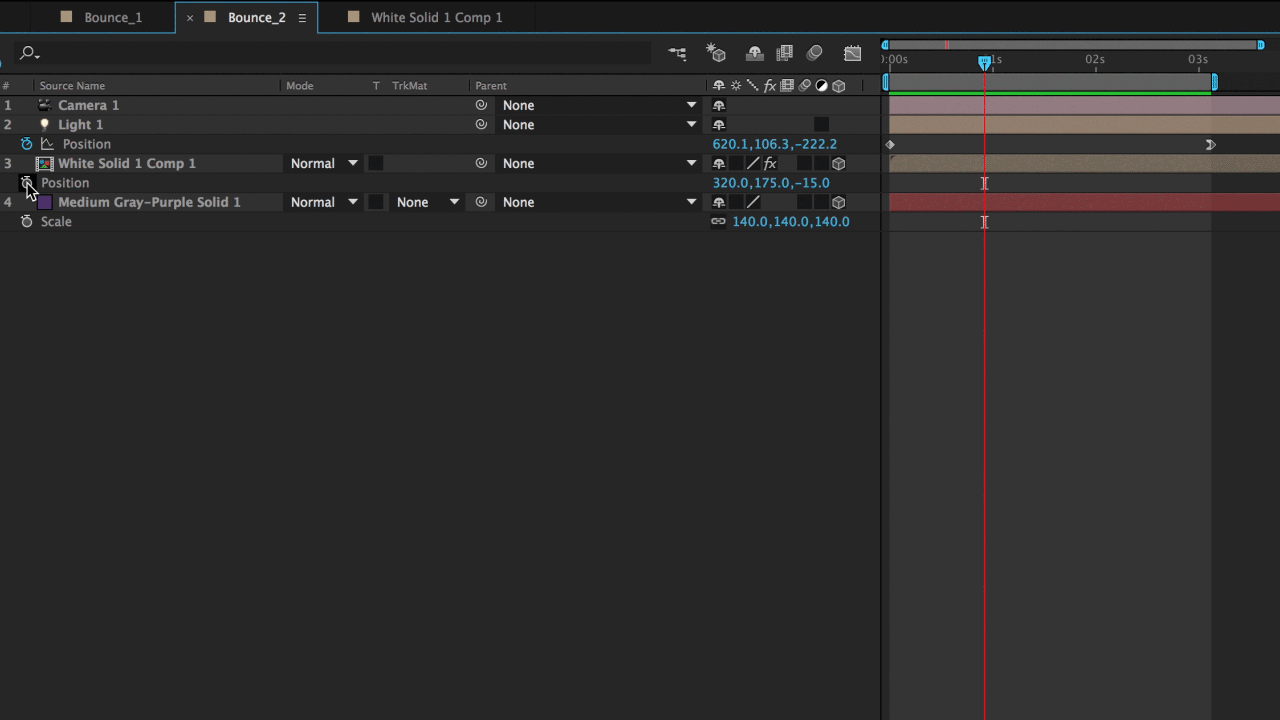
I use this expression all the time. It creates a dynamic “elastic” bounce on any keyframe value you add it to. That can be rotation, scale, position and even mask contours.

Rotation and Position Animated with Inertia Bounce
To use inertia bounce (or any expression), simply copy it below. In after effects, hold option down and select the stopwatch of any value you would like to add the expression to, then paste the expression in the text box.
Copy Expression here:
[pastacode lang=”javascript” manual=”%2F%2F%20Inertial%20Bounce%20(moves%20settle%20into%20place%20after%20bouncing%20around%20a%20little)%0An%20%3D%200%3B%0Aif%20(numKeys%20%3E%200)%7B%0An%20%3D%20nearestKey(time).index%3B%0Aif%20(key(n).time%20%3E%20time)%7B%0An–%3B%0A%7D%0A%7D%0Aif%20(n%20%3D%3D%200)%7B%0At%20%3D%200%3B%0A%7Delse%7B%0At%20%3D%20time%20-%20key(n).time%3B%0A%7D%0A%0Aif%20(n%20%3E%200)%7B%0Av%20%3D%20velocityAtTime(key(n).time%20-%20thisComp.frameDuration%2F10)%3B%0Aamp%20%3D%20.05%3B%0Afreq%20%3D%202.0%3B%0Adecay%20%3D%206.0%3B%0Avalue%20%2B%20v*amp*Math.sin(freq*t*2*Math.PI)%2FMath.exp(decay*t)%3B%0A%7Delse%7B%0Avalue%3B%0A%7D” message=”” highlight=”” provider=”manual”/]Then just add the keyframes. The expression will do the rest! You can also edit any of these values to get different results.
[pastacode lang=”javascript” manual=”amp%20%3D%20.05%3B%0A%0Afreq%20%3D%202.0%3B%0A%0Adecay%20%3D%206.0%3B” message=”” highlight=”” provider=”manual”/]
Inertia Bounce and the puppet tool
This expression is also effected by the time or distance between keyframes. For example, the closer the keyframes are together, the faster the bounce will happen, and the more it will bounce.
Learn more about Inertia Bounce >
2) Wiggle Controller
The wiggle expression is essential for creating dynamic animations like objects crashing or shaking over time.
Standard Wiggle Expression:
[pastacode lang=”javascript” manual=”wiggle(0%2C0)” message=”” highlight=”” provider=”manual”/]The wiggle expression is pretty common, but not many people know how to control it. To control the wiggle, you need to use Slider Controls. You can find slider controls in the effects panel. Create a null or adjustment layer with the name “Wiggle_Controller”, and add two slider controls. Name one “X” and one “Y”. This will be what you keyframe to control the wiggle. **(Updating this as one user pointed out, this isn’t controlling the X and Y, but rather the Frequency and Amplitude. Having X and Y variables can make it confusing). Name one “FREQ” and one “AMP” Once you do that, you can paste the following code on the value you want to wiggle:
Now if you animate “FREQ “and “AMP” values on “Wiggle_Controller”, you can control the wiggle.

Controlling the wiggle expression
3) Loop Out

Loop Cycle script used for position of the light and square in the scene
Loop out is another simple expression that can be used to loop any set of keyframes. It can be really handy for creating looping GIFs. There’s a couple of parameters that you can edit with it as well.
Loop Out Cycle:
“Repeats the specified segment.”
Loop Out Ping Pong:
“Repeats the specified segment, alternating between forward and backward.”
Loop Out Offset: (full disclosure, I’ve never used this one)
“Repeats the specified segment, but offsets each cycle by the difference in the value of the property at the start and end of the segment, multiplied by the number of times the segment has looped.”
Loop Out Continue:
“Does not repeat the specified segment, but continues to animate a property based on the velocity at the first or last keyframe. For example, if the last keyframe of a Scale property of a layer is 100%, the layer continues to scale from 100% to the Out point, instead of looping directly back to the Out point. This type does not accept a keyframes or duration argument.”
(Sourced from Adobe’s site)
Copy Expression here:
[pastacode lang=”javascript” manual=”loop_out(%22cycle%22)%0A%0Aloop_out(%22pingpong%22)%0A%0Aloop_out(%22offset%22)%0A%0Aloop_out(%22continue%22)” message=”” highlight=”” provider=”manual”/]
3) Time

Time Expression being used on hands of the clock
Yet another simple yet powerful expression, time can be used for any value that uses degrees.
Copy Expression here:
[pastacode lang=”javascript” manual=”time*140″ message=”” highlight=”” provider=”manual”/]4) Source Text
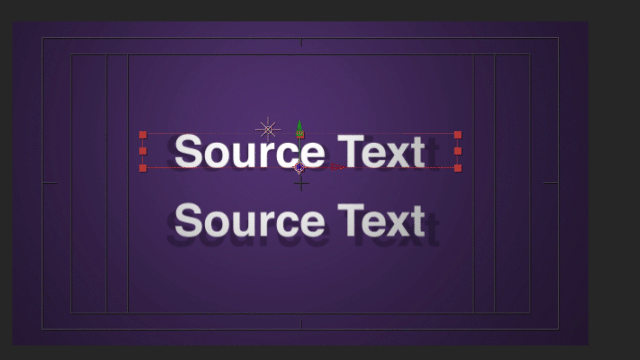
This “expression” allows you to link two different text layers. It’s really easy to create, and has helped me a ton. I used this expression to create a template of lower thirds where I wanted to control multiple compositions with a single text layer.
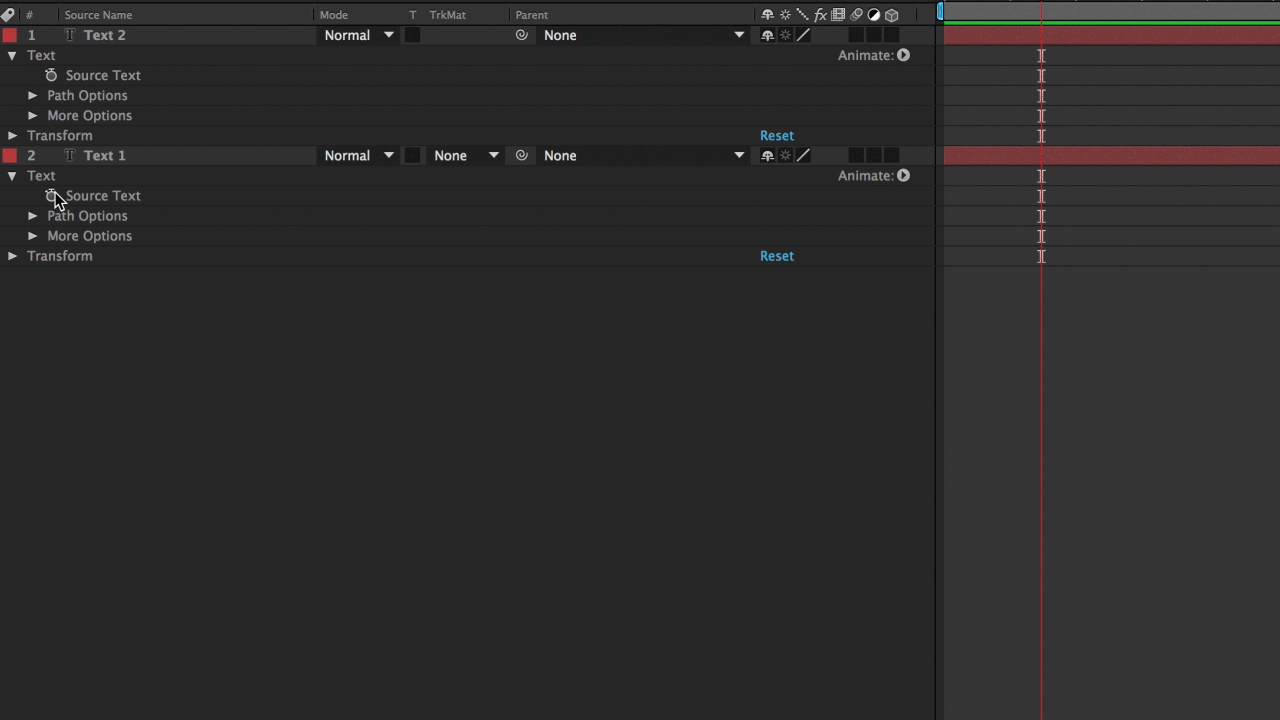
Using the pick whip to connect two text layers.
You can also connect two text layers that are in separate compositions.
Real time text linking
Hopefully you all found this helpful. I know there is a ton of other resources and this is really just skimming the surface of a vast ocean of expressions. Here are some more resources to get you on your way:
Adobe Expression Language Guide >

How To Create A Digital Speedometer
Related View More
A Beginner’s Guide to NFT Crypto Art for Motion Designers
Top Motion Design Trends To Look For In 2021
Quiz: How Well Do You Know Cinema 4D?
Freebies Round Up #2
Create 3 Easy Abstract Effects Using the Cell Pattern Plugin
Freebies Round Up #1